
How to Make Your Own Recycled Scrapbook Paper
Whether it's neatly organized into color-coded folders like my mother-in-law's or chucked into a tidy tray like a big cardstock lucky dip like mine, I guarantee that every scrapbooker has a scrap paper pile. Am I right?
Well, every now and then, I look at my pile of paper scraps and realize that I've used up all the good pieces and that I don't really like any of the pieces left in the tidy tray.
Even though I don't like the scraps left in there, I also can't stand the thought of throwing them out just because they're not pretty.
Do you know what I do? I recycle them and you can do it too. I'll show you how to make your own recycled scrapbooking paper. Keep reading and learn about these amazingly cheap scrapbooking on a budget ideas!
Having trouble organizing your scrapbook supplies? Check out our Stress Free Photo Organization Book and never have to worry about your materials going all over the place!
Table Of Contents:
1. What You'll Need
2. Create Your Paper Mesh Mold
3. Prepare Your Scrap Paper
4. Blend
5. Pour Your Pulp Into The Mold
6. Transfer The Mold
7. Extract The Page
8. Dry Your Paper
9. Making It Look Pretty
10. Affordable Scrapbook Making
11. Benefits Of Making Your Own Paper
Scrapbooking for less - Here's what you'll need to make your own recycled scrapbook paper
• A pile of scrap paper (feel free to also use junk mail and old newspapers)
• A blender or food processor
•Water
•An old picture frame
•2 x pieces of mesh the same size as your picture frame (fly screen mesh works great)
•Nails, staples, duck tape - anything to attach your mesh to the picture frame
•A tray or bucket slightly larger than your picture frame
•A sponge or cloth ideal for soaking up water
•An old towel
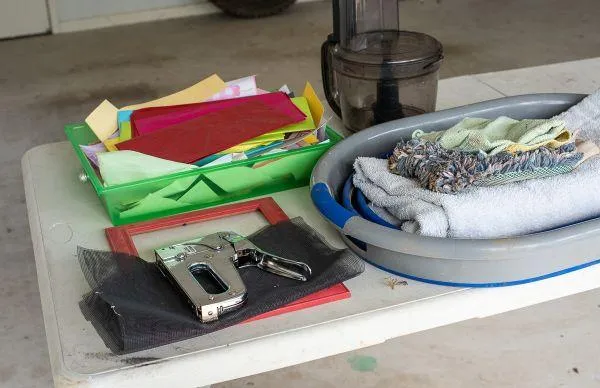
Prepare your materials beforehand!
Step 1 - Create your recycled paper mesh mold
Assembling the mold is easier than it looks, I promise!
Grab your picture frame and make sure to remove the back, glass, and anything else so you are left with the frame only.
Using either an industrial stapler or ducktape (I used both), attach one of your mesh pieces to the frame, so that the mesh is secured at the back of the frame like in the photograph below. It doesn't have to be neat, it just has to be pulled taught.
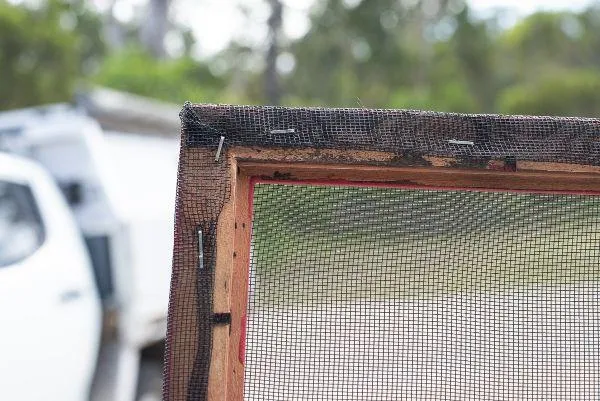
Make sure that the mesh is properly secured to your frame

If you have good quality duct tape or gaff tape that can withstand getting wet, you could also use this to attach the mesh instead of staples.
Guess what? You've nearly finished making your paper mold. All you need to do now is grab your second piece of mesh and cut it so that it approximately fits inside the frame like the photograph below.
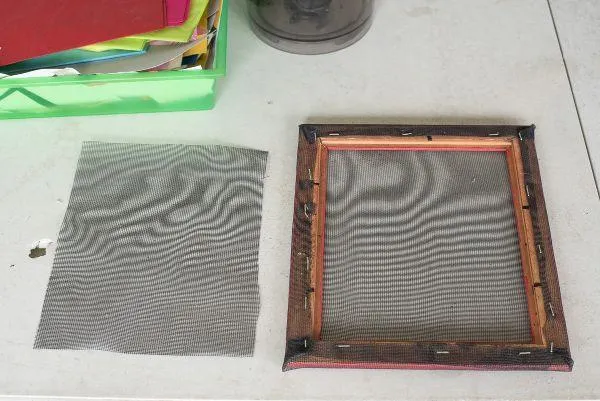
Don't stress if making the mold feels like too much or you don't have a spare picture frame lying around. You can buy these molds for under $10 on Amazon by searching for paper making mold! Recycling scrapbook paper really is an affordable scrapbook making project!
Step 2 - Prepare your scrap paper
This is probably my favorite step when it comes to recycled scrapbook paper as there is just something totally satisfying about ripping paper up. It's also one of those things the kids can easily help with.
Grab your scraps and tear them into one-inch strips. I threw my torn strips straight into the blender as I worked so that I didn't have to transfer it later when it was time to blend.
I should mention that in this example, I used mostly pink-toned scraps so that I would end up with pink-toned paper. I'll show you some more color examples at the end of this tutorial!
Step 3 - Get ready to blend and ... go!
I filled the blender around a quarter loosely full of paper and then poured water in so that the water sat around the halfway to two-thirds mark. Once your water and paper are happily mingling in there, let them soak. Many people like to let it soak overnight but patience is not my virtue and I let it soak for around an hour.

Don't forget to soak the paper first so it's easier for the blender to turn your scrap paper into a pulp
It really doesn't matter if you put too much water in when you're making recycled scrap book paper because it gets drained out later. More water is better than not enough when it comes to making recycled paper as the blender will have to work too hard if you don't put enough water in.
Once it's had a good soak, go ahead and blend it for a minute or two. Mine was around this consistency (see the photo below) so if yours looks a little thick, just add some more water.
Tip - Always err on the side of more water!
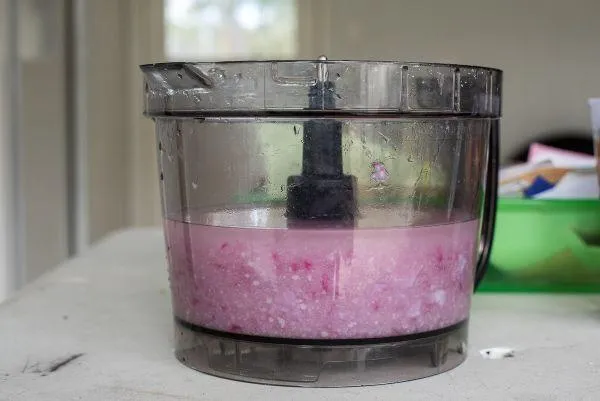
Paper absorbs water so you can add a bit more water before blending your scrap papers!

Step 4 - Pour your paper pulp into the mold
It's about to get messy!
Place your mold into the bottom of your tray or bucket and then tip your paper mulch directly on top of it. If you want to add any flower petals or decorations at this point, do it now and pour a little bit more pulp on top to stick them down.
You will see an example of adding flower petals at the end of this tutorial.
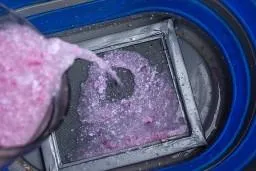
Don't pour your pulp all at once, do it slowly until you fill up your mold
Step 5 - Transfer the mold to your towel
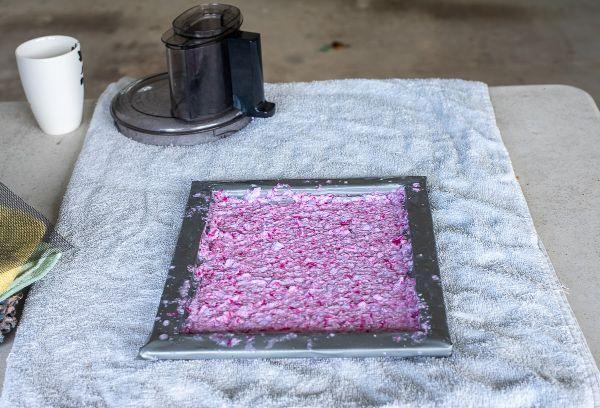
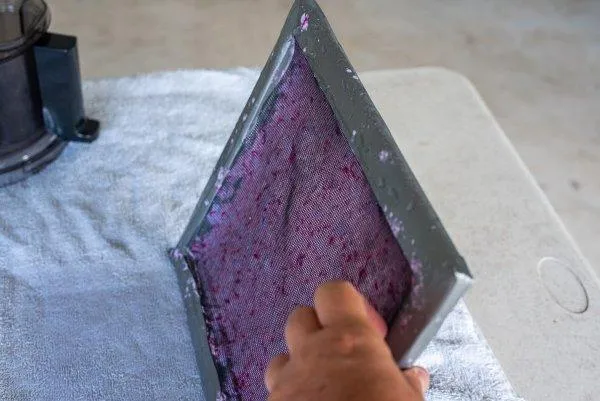
Using both hands, lift your mold and hold it up above your tray to let the water drain back into the bucket, leaving a nice lot of pulpy paper in your mold.
Once the water stops dripping from the bottom of your mold, place it on your towel like in the below photo.
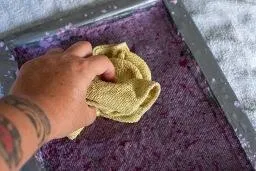
For the next step, you'll need to grab your spare piece of mesh and place it on top of your paper pulp.
Using a sponge or some sort of absorbent cloth, press on top of the mesh to soak up excess water from the paper.
Step 6 - Flip your mold over and remove your page
This is the most nerve-racking step of the whole process! With your newly created piece of wet page wedged between the two mesh pieces, grab your frame and quickly flip it over upside down.
Use your sponge or cloth and now press it against the other piece of mesh (which is now sitting on top) to soak up excess liquid.
Make sure that the pulp is properly set on your mold before flipping it over.
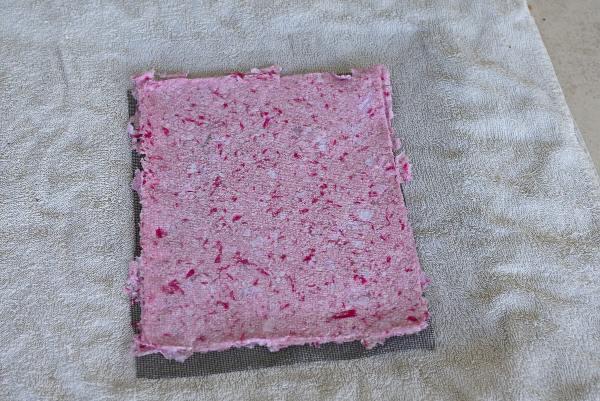
As you are doing this, you should see the page kind of fall away from the mesh onto your towel. If it doesn't, just give it a gentle tap. Next, lift the frame off and you will see your beautiful piece of paper sitting on top of a piece of mesh on your towel.
Woohoo you did it ... you now have recycled paper for scrapbooking and it's for free!
You will see in my example below that my recycled scrapbooking paper is quite thick and has larger pink chunks. If you don't like the colored chunks, just blend it a little longer to get rid of them. I also laid the pulp down quite thick which isn't necessary, particularly if you would like a thinner piece.
Step 7 - Dry your paper
Now, there are a few different ways you can dry your paper.
Air dry - Let it air dry by either sitting it out in the sun or inside on a flat table.
Iron dry - Place your paper between two paper towels and run the iron over the top.
I recommend letting it either air dry or iron dry it a little, and then place your piece of paper between two pieces of felt like this.
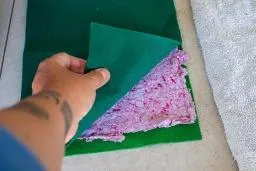
Make sure to properly dry your recycled paper!
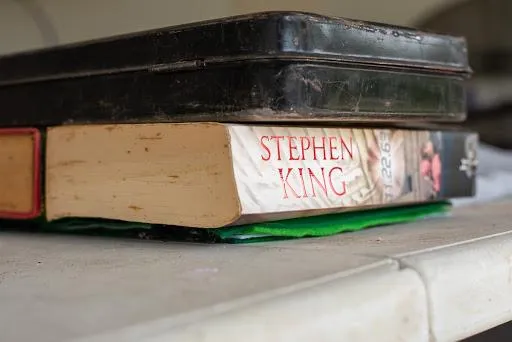
Once your piece of paper is sitting snugly in the middle of the felt sandwich, place some heavy books on top and let it sit overnight. I even added a heavy toolbox on top of my books for added good measure. This ensures that your paper dries completely flat and you can even layer a few felt paper sandwiches.
There are actually four felt paper sandwiches under there!
Making it look pretty!
There are many different ways to give your recycled scrapbook paper some added interest. You can add food dye in the blending stage or you can even use real food to dye your papers.
Try throwing some onion skin in or a piece of beetroot and see what colors you get. Scrapbooking for less by experimenting with brightly colored flowers or other plants from the garden.
In the image below on the left, I used an assortment of colored papers and added some flower petals as I was pouring the pulp from the blender into the mold. In the image on the right, I used mainly black and dark blue pieces of scrap papers and added a vial of gold glitter to the blender for the last 10 seconds.
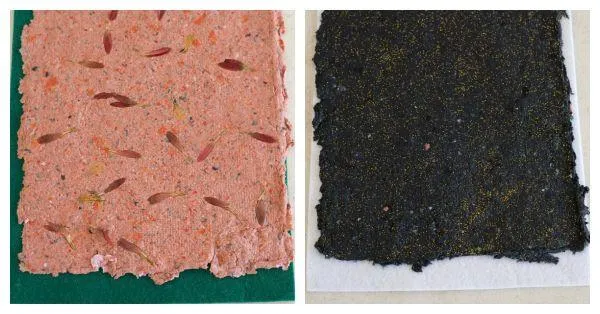
Make a DIY scrapbook paper by recycling your paper scraps!
Affordable scrapbook making
Making recycled paper is one of the many great ways you can start scrapbooking for less. By reducing your paper waste and making one-of-a-kind pieces of papers and embellishments that you would otherwise have to purchase from a store.
I would love to see some of your recycled paper? What techniques have you come up with to make your recycled scrapping paper unique?
Benefits of making your own scrapping pages
Making your own sheets and pages not only save you a ton of money and help clear off your trash, it gives you a great feeling to make something of your own.
The rustic end results in a beautiful craft sheet that you can use for your future layouts. What's even better is that you can use it as a gorgeous scrapbook cover.
What I love about this project is that I can already think of various fun scrapbooking ideas that I'd like to create. From a great baby girl scrapping layout to a wonderful family tree scrapbooking page, this is definitely a wonderful addition to my future scrapbook album.
Another way you can use your DIY scrapbook sheet is by using your craft puncher and creating fabulous embellishments along the way. It's definitely more satisfying and authentic than just making a scrapbooking printable for your layout.
Tell me what you think about making your own scrapbooking sheet!
OUR BEST SELLING BOOKS


HERE'S SOME OTHER SCRAPBOOKING ARTICLES THAT YOU MAY FIND HELPFUL
The Top 5 Scrapbooking Tools That Are Proven To Help You Create Better Layouts
12×12 Scrapbook Layouts Tips You Should Never Miss!
5 Tips To Creating Catchy Scrapbook Titles For Your Layouts
TOP 5 Scrapbooking Ideas I LOVE!
How to Scrapbook: The Ultimate 'Learning How to Scrapbook for Beginners'
Scrapbooking Tips: 10 Tips To Help You Create Even More Enchanting Pages!
5 Simple Scrapbook Organization Ideas and Tips!
Scrapbook Stores Online: Shop from the Top 7 Best Craft Stores
Contact Us | Login | Store | About | Reviews | Privacy Policy | Terms & Conditions | Returns
Copyright © 2025 by ScrapbookingCoach.com
We accept payment with:
