Beginners Guide in Using a Die Cuts For Scrapbooking to Create Beautiful Embellishments
Die cut scrapbook embellishments can take your scrapbooking pages from just "so-so" to "whoah!", allowing you to create beautiful cut-out embellishments to your work with ease.
With a never-ending supply of themes to choose from, die cutting embellishments can add a level of sophistication to your page that you otherwise just wouldn't achieve.
With so many to choose from, they are also fun to browse and buy, or even make yourself with a die cutting machine!
Table Of Contents:
1.What Is A Die Cut Machine?
2.Use Die Cut For Making Embellishments
3.What Die Cut Should I Get
4.Using Die Cutting Machine For Die Cuts
5.Final Thoughts
But what exactly is a die cut machine?
A die cut is a piece of material such as cardstock, felt, paper, or scrapbook stickers that have been cut out by a die cutting machine into a shape. They are often also referred to as cutouts, ephemera, or paper page embellishments.
Die cut scrapbook embellishments are a great alternative to hand-cutting shapes with scissors or a craft knife and usually look professional and precise every time. They save a lot of time and allow you to be creative with different themes and styles.
Die cuts can be purchased from craft stores, two dollar stores, or the craft section of large department stores. Many scrapbookers choose to make their own with a die cutting machine. I'll talk more about that a bit further down!
Below are some die cuts of mini picture frames that were purchased from the craft section of my local department store.
Want more scrapbooking tips and tricks? Click here and check out our Layout Ideas Books!
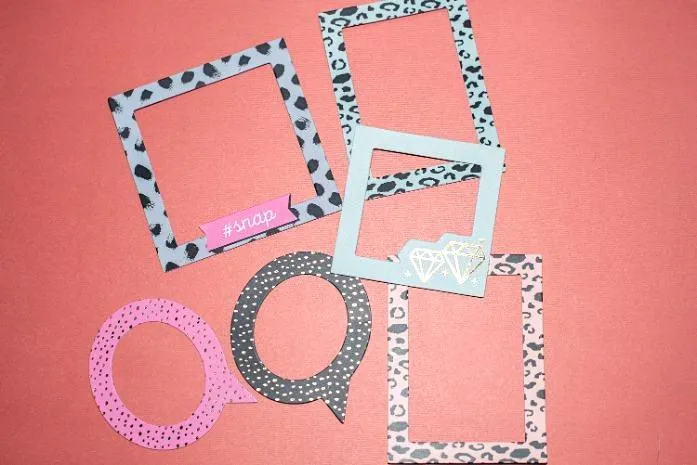
Die cut embellishments are great for adding accents to your page!
Use die cutting machines for making scrapbook embellishments
The options for die-cut shapes are endless and they are used not only in scrapbooking but card making and other papercrafts.
When it comes to scrapbooking, die cuts can be very, very, broadly classified into stand-alone die cuts, themed die cuts and layering die cuts. And these can either be manual die cutting tools or machines OR electric die cut machines.
Die cut machines are a bit pricier but many serious scrappers or craft artists would prefer it.
Stand-alone die-cut embellishments are the most common cut-out to purchase from a shop. They can be used as-is and don't require you to glue pieces on top of each other to complete them.
They can be self-adhesive or non-adhesive and come in a massive variety of shapes and sizes. These can include words such as "love" that can be used as your scrapbooking page title, geometric shapes such as rectangles for picture frames, or even a graphic such as a butterfly or diamond shape.
Stand-alone die cuts often come in a pack with a theme, so a floral-themed pack would include a few different flower shapes and a birthday theme pack may include some words and birthday-shaped imagery such as balloons.
Below is a chalkboard-themed set of die cut stickers that I purchased from my local two-dollar store. These will be great for the first day of school or graduation-themed scrapbook layout!

Layering die cuts are just beautiful for scrapbooking but these are harder to find in-store and are usually cut out at home on die cutting machines. Layering die cuts are designed so that the shapes stack on top of each other in the final project.
Floral images and hearts are popular items to be layered in scrapbooking pages, as are basic shapes such as circles and squares.
What die cuts should I get for scrapbook embellishments?
Although you will probably find yourself reaching for anything that takes your fancy at the shops knowing that you will use it at some point as a scrapbooking embellishment, to begin with, it's great to grab a few geometric shapes, words, letters, and floral themes.
Basic shapes such as the ones below are really useful when it comes to creating embellishments for your scrapbooking pages.

Set the theme of your page by using die cut embellishments!
Geometric shapes are your squares, circles, diamonds, etc., and can be used to mount something else on top of it, showcase your page title, or even as a picture frame for your photographs.
Tag shapes are incredibly popular with scrapbooking and you would be hard-pressed to find a scrapbooker that hasn't used a tag shape in at least one of their layouts!
Floral themes are just incredibly versatile and work across many scrapbooking pages. You can't go wrong with a few floral die cuts.
Words and letter die cuts just add a level of neatness that is hard to compete with when cutting out letters by hand. I love the word and letter sticker die cuts for their ease of use, except when I run out of a particular letter ... that's frustrating!
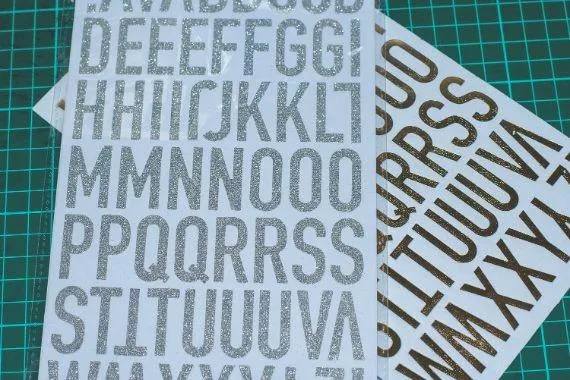
Not confident with your handwriting? Use Die cut letters instead!

Using a die cutting machine to create your own die cuts
I guarantee that at some point during your scrapbooking sessions, you will start thinking about buying a die cutting machine to create your own scrapbook embellishments.
Although they are not essential, it is really fantastic to be able to create your own custom die cuts on the go as you need them. This is one purchase you will not regret and you will also find yourself using it for other craft applications such as card making and sewing.
I actually saw a YouTube video once of someone using their digital die cutting machine to cut flatbread into the shape of a dinosaur for their kid's lunch. Although it turned out wonderful, I don't recommend doing this!
There are two main types of die cutting machines, manual and electric. Manual die cutting machines are more affordable and work a little like a cookie-cutter, but in this case, the cookie cutter is called a die and the cookie dough is your paper or cardstock. Mmmm cookies.
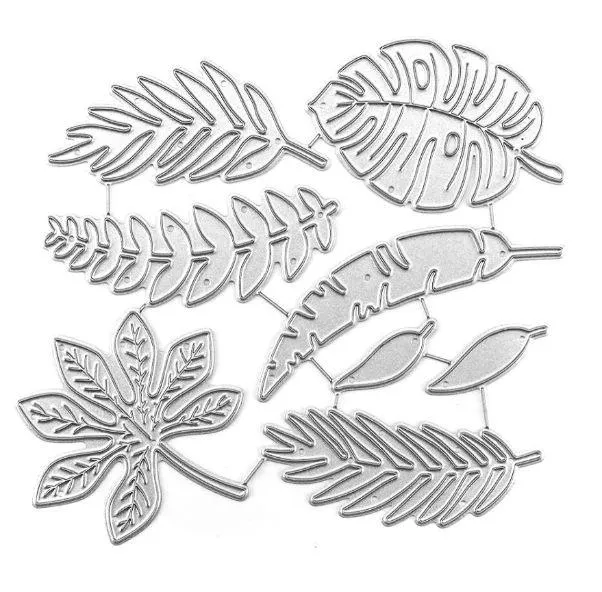
A die (your cookie cutter for cardstock) is a metal-shaped object with a raised-sharp area for cutting. The shape of the die is the shape that will be cut into your paper.
Dies are often sold in themes like this one below.
Save time and money by using die cut machines to
make DIY scrapbook embellishments
So this is how you do it ... It's easy peasy! You grab your cardstock or paper and a shaped metal die and place it on the platform of your manual machine. A plastic mat is placed on top to keep everything in place, essentially making a ''sandwich.''
The sandwich is forced through the machine with a crank handle and as it passes through, the pressure forces your die to cut the shape into your paper.
I think one of the greatest benefits of your manual die cutting machines is that you can also use them for embossing, and dies can even be purchased with matching stamps.
A digital die cutting machine is powered by electricity and no die is required. The die cutting machines are controlled by computer software and a blade in the machines passes over the paper and cuts it for you.
Although not as simple as a manual die cutting machine, you are not as limited in terms of shapes as you don't need to purchase a die, and there is a never-ending supply of digital templates out there ready to use.
Once you master your digital die cutting machine, you will never look back!
You can also check out our article about scrapbooking cricut machines and learn how to make more wonderful embellishments using cricuts!
You can't go wrong with die cutting embellishments for scrapbooking
Die cutting machines are one of the best scrapbooking supplies you can get. Whether they're a simple silhouette, a fancy cursive writing sticker, or a beautifully layered flower die cut, we would love to see some of your scrapbooking layouts using die cut embellishments.
Happy scrapbooking!
OUR BEST SELLING BOOKS


HERE'S SOME OTHER SCRAPBOOKING ARTICLES THAT YOU MAY FIND HELPFUL
The Top 5 Scrapbooking Tools That Are Proven To Help You Create Better Layouts
12×12 Scrapbook Layouts Tips You Should Never Miss!
5 Tips To Creating Catchy Scrapbook Titles For Your Layouts
TOP 5 Scrapbooking Ideas I LOVE!
How to Scrapbook: The Ultimate 'Learning How to Scrapbook for Beginners'
Scrapbooking Tips: 10 Tips To Help You Create Even More Enchanting Pages!
5 Simple Scrapbook Organization Ideas and Tips!
Scrapbook Stores Online: Shop from the Top 7 Best Craft Stores
Contact Us | Login | Store | About | Reviews | Privacy Policy | Terms & Conditions | Returns
Copyright © 2025 by ScrapbookingCoach.com
We accept payment with:
