WASHI TAPE SCRAPBOOK IDEAS: 12 AMAZING THINGS YOU
CAN DO WITH WASHI TAPES
Washi tapes are versatile scrapbooking supplies that every scrapper should include in their scrapbook supplies list!
Washi tape is by far my favorite supply as there are SO many things you can do with washi tape in your scrapbook layouts.
But what exactly is washi tape? Well, washi tapes are decorative sticky tapes that come in many beautiful colors and unique designs. They are used in all sorts of crafting projects but are particularly useful as a scrapbook embellishment.
For those of you who have recently discovered washi tape for your scrapbook through to those of you that already have a serious washi tape addiction, I'm going to share with you 12 of my favorite ways to use washi tape in your layouts.
TABLE OF CONTENTS:
1.Washi Tapes as Flags
2. Washi Tapes for Journaling
3. Washi Tapes as Scrapbook Hinge
4. Washi Tapes as Background
5. Washi Tapes as Sunburst Pattern 6. Washi Tapes as Accent
7. Stamp on Washi Tapes
8. Washi Tapes as Ruffle Strip
9. Washi Tapes as Ruffle Flower
10. Washi Tapes as Border
11. Washi Tapes Punches
12. Washi Tapes as Tag Embellishments
#1 - MAKE MINI WASHI TAPE FLAGS FOR YOUR SCRAPBOOK
Using washi tape in your scrapbook to create flags or bunting is a really quick and easy way to jazz up your page.
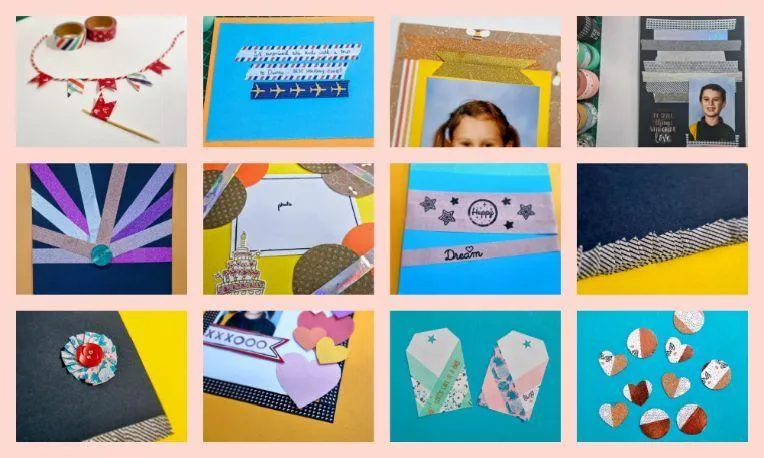
As you can see from the photograph below, mini flags can be made with a toothpick, and bunting can be easily made with some leftover string.
All you need to do is tear off a small strip of washi tape and wrap it in half around the toothpick or string so that the sticky sides are stuck together. Finish the flag off by cutting out a V-shape from the end of the flag.
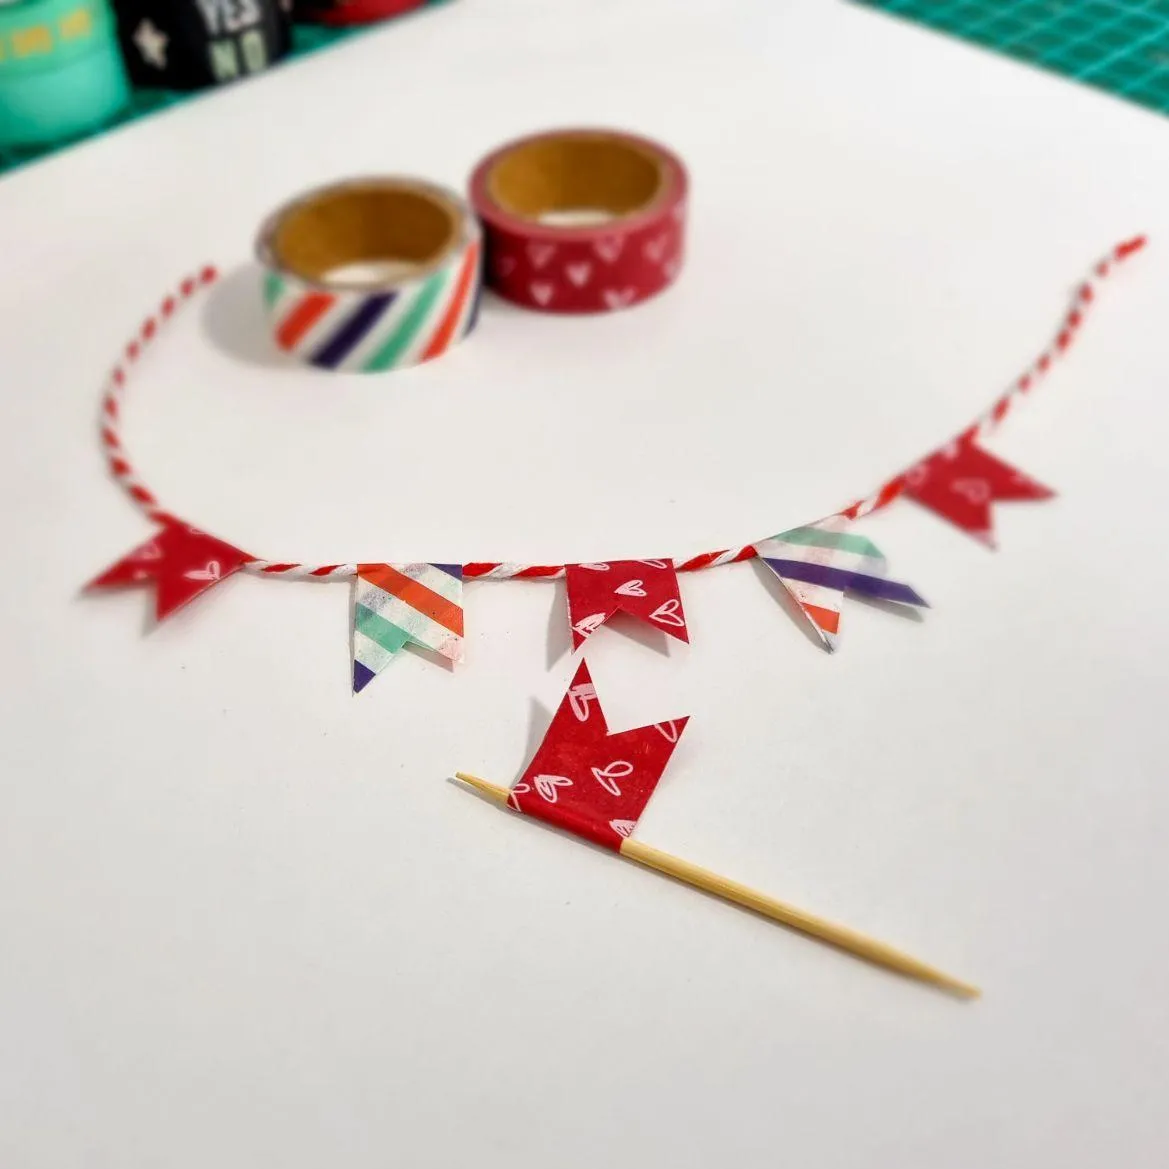
Use different patterned washi tapes when making flag buntings!
#2 - JOURNAL ON TOP OF YOUR WASHI TAPE
To add interest to your scrapbook journaling, try writing over top of one or more of your washi tapes. You will want to use either a plain colored washi tape or one with space in it to fit the writing.
You will see in the photograph below that I found a tape that had a nice white stripe in the middle of it that was just perfect for journaling over the top.
Really shiny or glossy washi tapes are not suitable for this as the ink can't soak in and dry however, washi tape that has a matte finish (non-shiny) should work great.
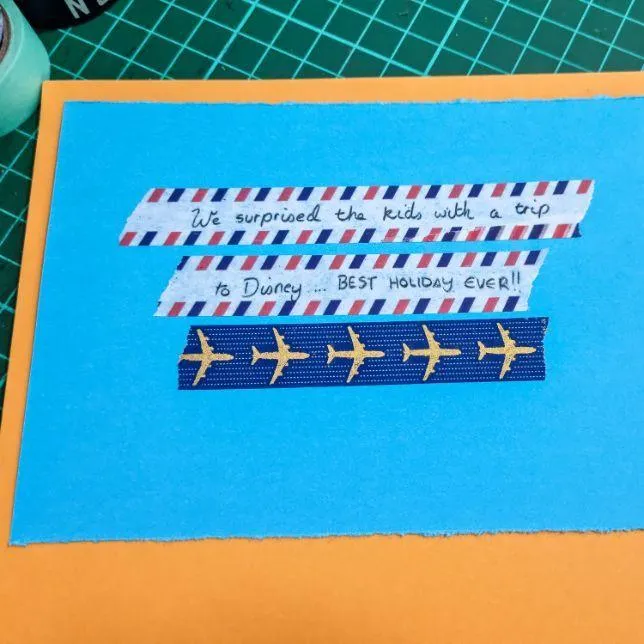
Write down your journal on the washi tape before adhering it to your layout.


#3 - MAKE A WASHI TAPE SCRAPBOOK HINGE
Washi tape makes a fantastic hinge, allowing you to create a ''flipbook'' type element to your scrapbooking layouts.
Secure a piece of card or a photograph down on one side only with a strip of washi tape (as per the photographs below) and you will be able to flip it over to reveal either more photographs or some handwritten notes underneath.
I really love making washi tape scrapbook hinges as it allows me to sneak some extra photographs in without making the page look cluttered.
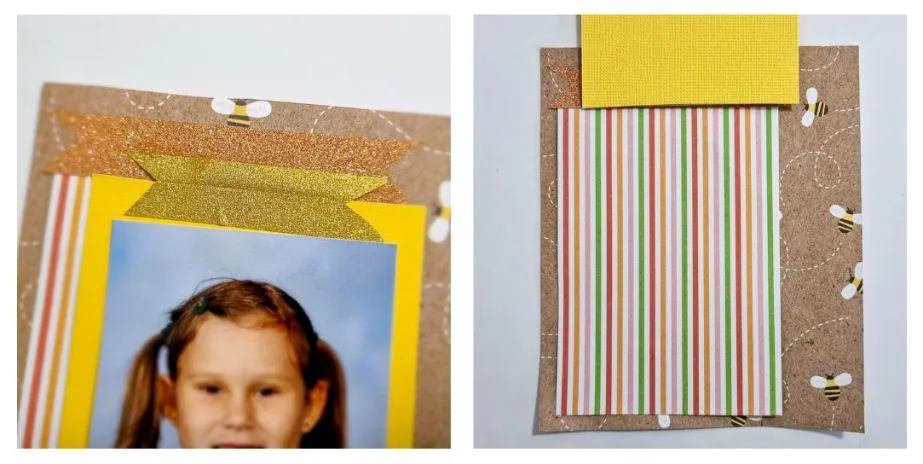
Create interactive layouts by using washi tapes!
#4 - USE WASHI TAPE TO MAKE A STRIPED BACKGROUND
Make a washi tape scrapbook background by laying different patterned tapes down either horizontally or vertically on the page. You can keep it muted with soft tones or really make your page stand out with bold and bright colors and patterns.
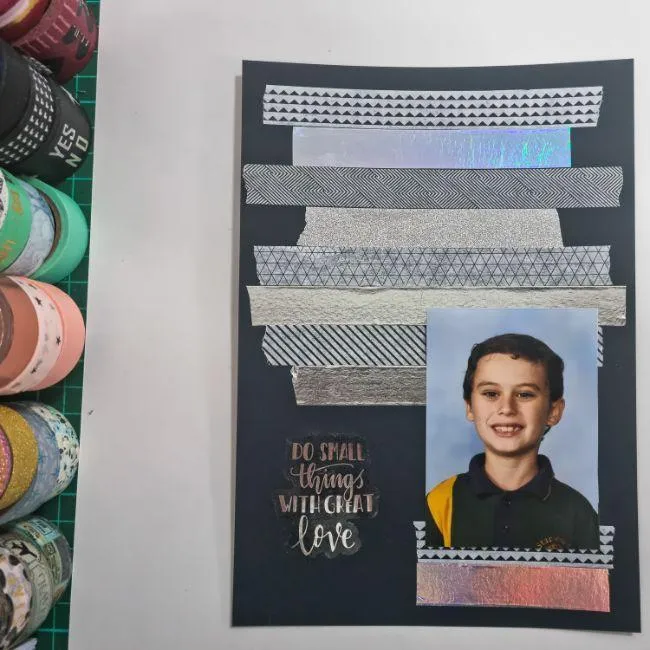
Add a rustic touch to your background by using different lengths of washi tapes!
#5 - MAKE A SUNBURST PATTERN WITH YOUR WASHI TAPE
A sunburst pattern is really easy to make with washi tape and adds a nice bright element to your scrapbooking page.
Mark a dot on your page where you would like the sunburst pattern to radiate from and lay down strips of washi tape that begin from this dot and continue off the edge of the page.
Make sure to leave a little overhang off the edge of the page as when you have laid down all of your ''sun rays', you will then get your scissors and snip off the excess, resulting in a really nice clean finish.
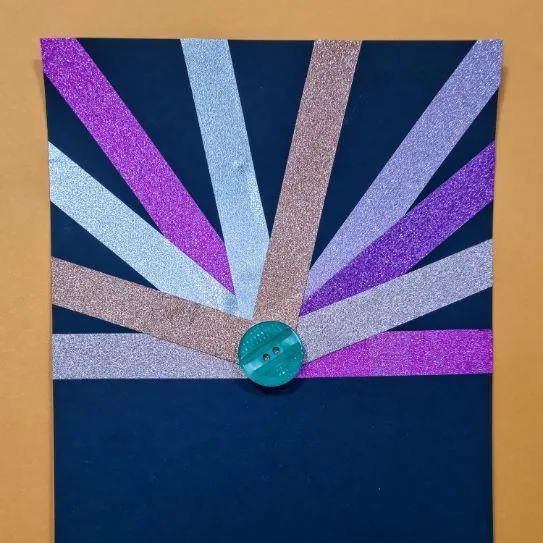
Use different shades of the same color to create an amazing sun ray effect!
#6 - USE WASHI TAPE AS AN ACCENT ON YOUR SCRAPBOOKING PAGE
Use your washi tape as an accent on your scrapbooking page to compliment your color scheme.
In the example below, I have used reflective silver washi tape to tie in with the shiny, gold birthday cake sticker and shiny dots on some of the larger circles. Although you can't see it in the photograph, the ends of the strips have had a V-shape cut out of them (similar to the ends of the flags in idea #1) to make them look neat and tidy.
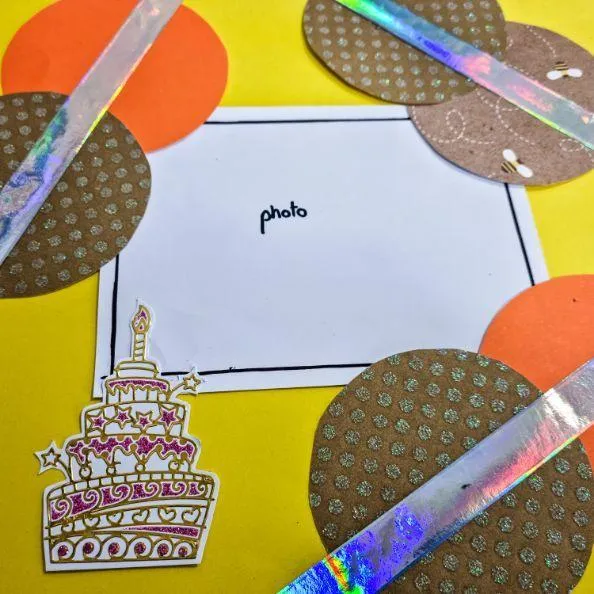
Use washi tapes to add character to your layout!


#7 - STAMP ON YOUR WASHI TAPES
In a similar fashion to journaling on your washi tape (idea #2), get some of your smaller stamps out and have a go at stamping some designs onto your tape.
This idea is great for crafters like me, who have terrible handwriting, and sometimes just want your words and phrases to look neater.
Like journaling onto your washi tapes, really shiny or glossy washi tapes are not suitable for this as the ink can't soak in and dry however, washi tape that has a matte finish (non-shiny) should work great.
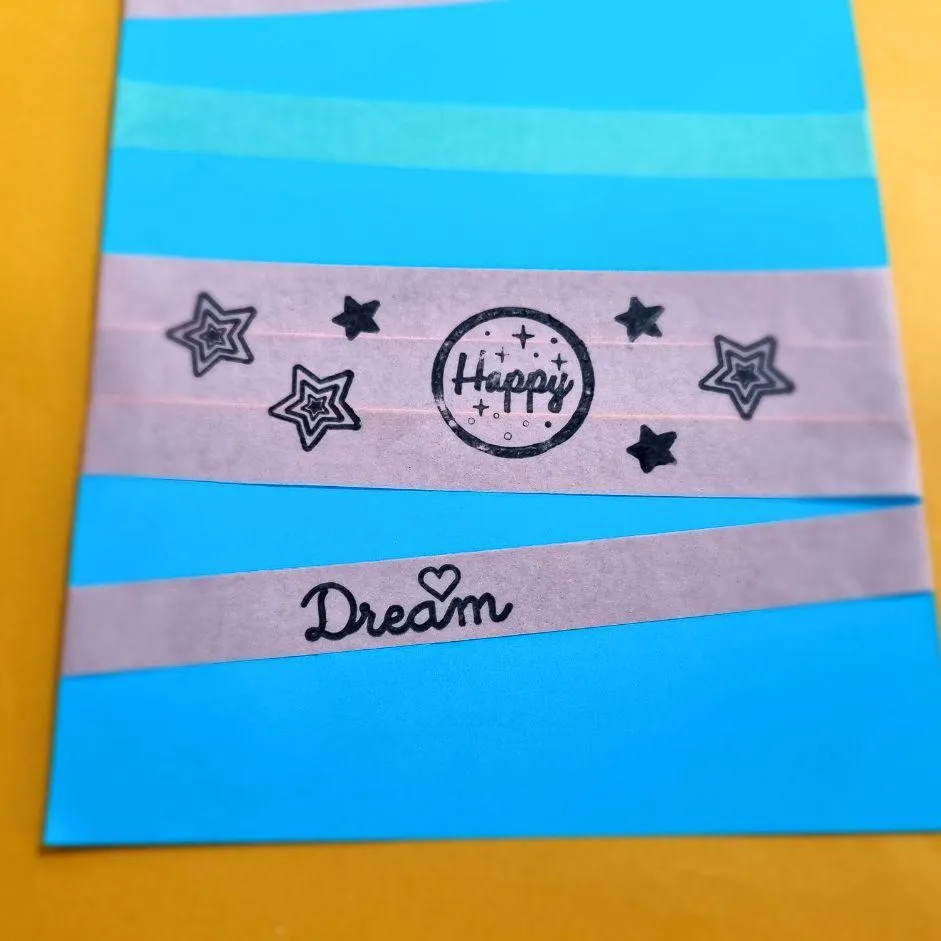
Add an extra layer of dimension to your layout by using stamps on your washi tape!
#8 - MAKE A RUFFLE STRIP WITH YOUR WASHI TAPE
Use your washi tape to make a really cute strip of ''ruffle'' on your scrapbooking layout. It's really simple to make but uses up a lot of tape so it's best suited to generic tapes that don't cost too much.
I used a simple black and white striped washi tape for my ruffle as anything with a picture will get lost in the folds.
The ruffle is made in a very similar way to pleats on a skirt, except it's more fun to make because you don't need an iron and you don't have to be as precise. You basically just keep folding the washi tape back on itself before laying the next little bit down.
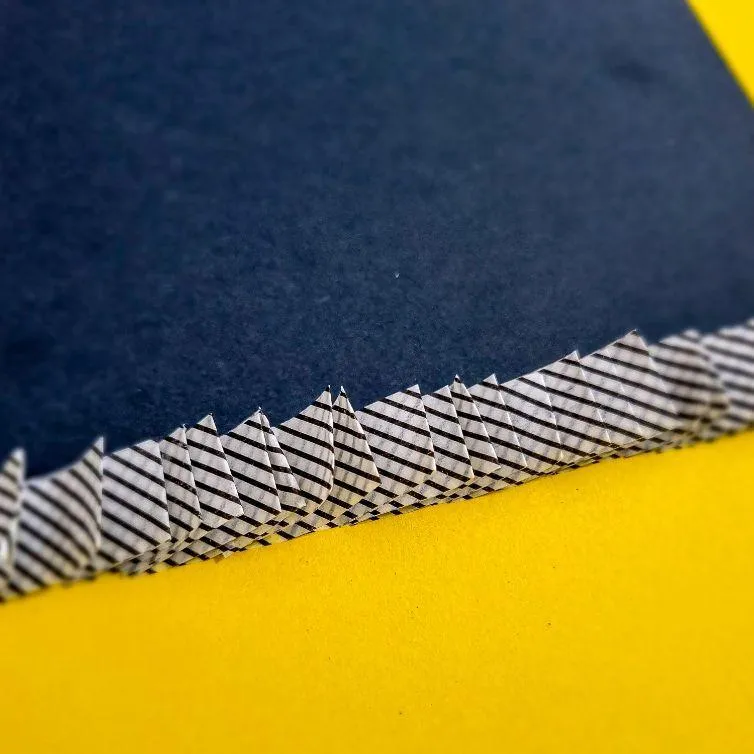
Add texture to your border using ruffled strips of washi tape!
#9 - MAKE A WASHI TAPE RUFFLE FLOWER
Make a cute ruffle flower using the ruffle technique above but instead of following a straight line, following a circle shape. It looks a little messy in the middle so it's great to stick on a button or something in the center to cover that bit up.
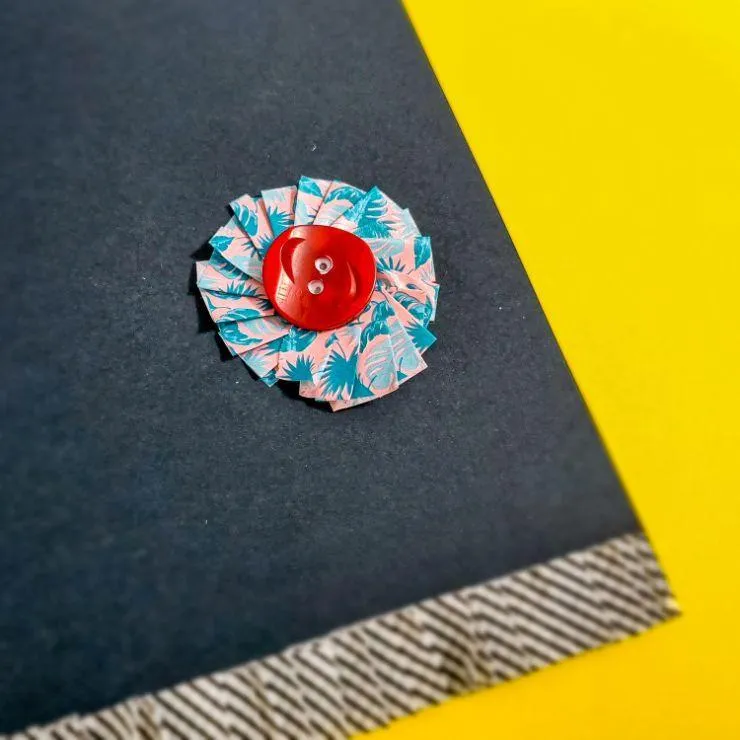
Turn your washi tapes into flower embellishments with a simple ruffling technique!
#10 - USING WASHI TAPE AS A BORDER
Out of all the things you can do with washi tapes, using it as a border is probably the most popular, and for good reason too. It looks great and it's super simple to do! You don't always have to create a scrapbook border around the entirety of your page as smaller borders around photos and embellishments look just as amazing.
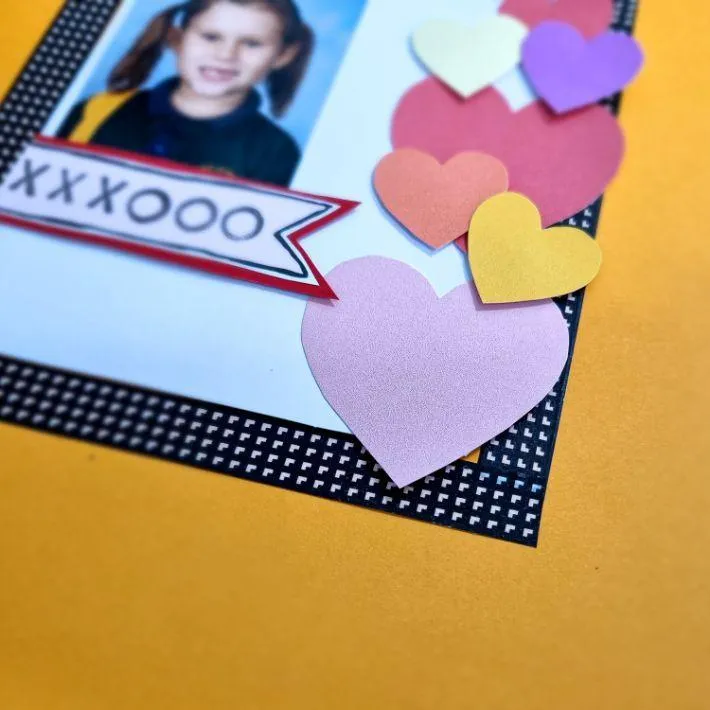
Washi tapes are perfect for creating borders fast!
#11 - USE YOUR CRAFT PUNCHES TO PUNCH OUT PRETTY WASHI TAPE SHAPES
This is one of my favorite things to do with washi tape in my scrapbooking as it uses up both my scrap paper and any washi tape that's been sitting around for a while.
Grab some scrap pieces of paper and cover them with strips of washi tape. Once it's completely covered, trim the edges of the tape so that they are in line with the edges of your scrap card. Then, using various craft paper punches, cut out some nice shapes that now feature the beautiful patterns of your washi tapes.
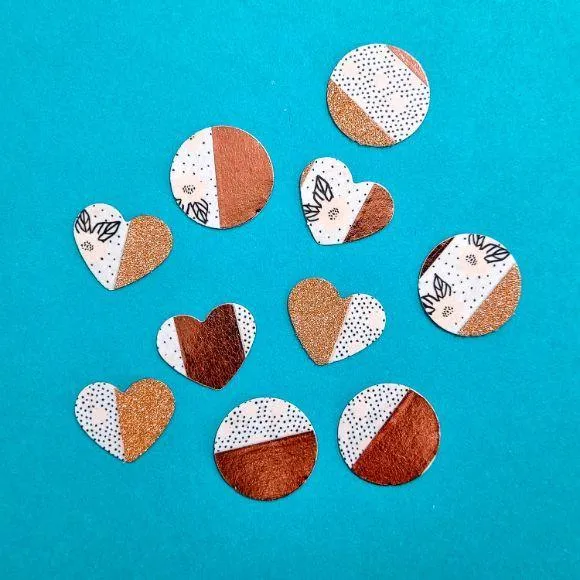
Make cut out embellishments from your excess paper and washi tapes!
Tip: What do you need for scrapbooking? Click the link to learn about our top 7 items every sprappers must have!
#12 - LEVEL UP YOUR TAG EMBELLISHMENTS WITH WASHI TAPE
Level up your tag embellishments with pretty pieces of washi tape laid down in diagonal stripes across the tag. This is another great way to use up both your scrap cardstock and any washi tapes you want to use up.
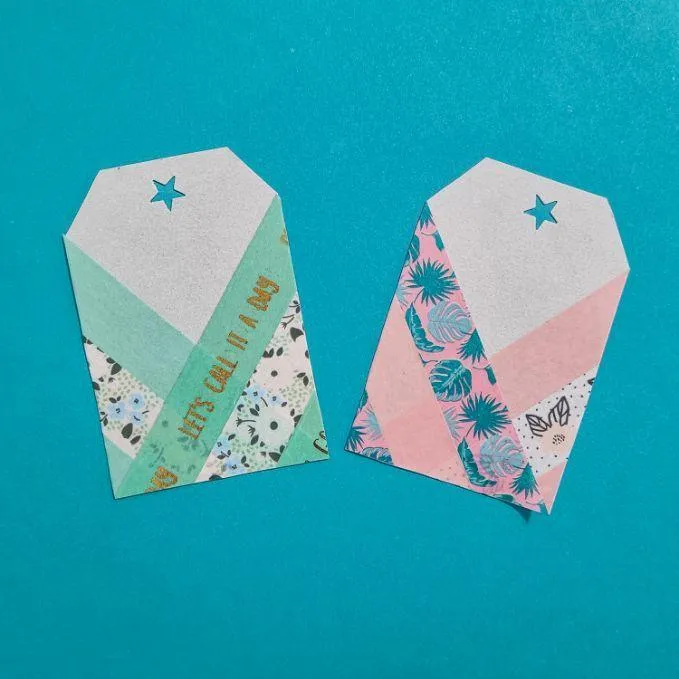
Stylize your scrapbook tags with a bit of washi tape!
I hope you have found some inspiration from these washi tape scrapbook ideas. Do you use washi tapes in your scrapbooking? We'd love to see some of your washi tape scrapbook layouts.
Happy scrapping!
HERE'S SOME OTHER SCRAPBOOKING ARTICLES THAT YOU MAY FIND HELPFUL
The Top 5 Scrapbooking Tools That Are Proven To Help You Create Better Layouts
12×12 Scrapbook Layouts Tips You Should Never Miss!
5 Tips To Creating Catchy Scrapbook Titles For Your Layouts
TOP 5 Scrapbooking Ideas I LOVE!
How to Scrapbook: The Ultimate 'Learning How to Scrapbook for Beginners'
Scrapbooking Tips: 10 Tips To Help You Create Even More Enchanting Pages!
5 Simple Scrapbook Organization Ideas and Tips!
Scrapbook Stores Online: Shop from the Top 7 Best Craft Stores
Contact Us | Login | Store | About | Reviews | Privacy Policy | Terms & Conditions | Returns
Copyright © 2025 by ScrapbookingCoach.com
We accept payment with:

