
How to Make a Scrapbook From That Old Box of Photos
Isn't it fun to discover old photos that you had forgotten about? That just happened to me! Because of one rainy morning, my plans changed and I decided to tackle the front closet once and for all. I'm going to create scrapbook pages from these amazing scrapbook ideas for these nostalgic photographs!
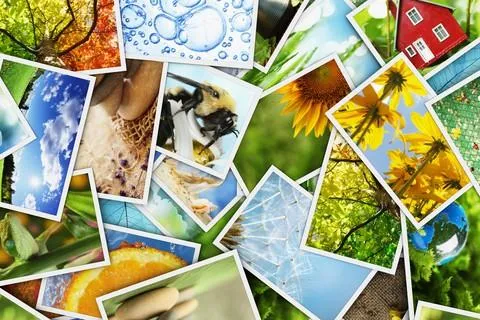
It's really fun to scrapbook your old memorable photos!
The closet had been storing everything but coats and boots which I intended to store in there! As I was hauling stuff out to clear the closet, I came across an old box that contained photos from my childhood. These were pictures that were passed on to me by my mother.
As I began to look through the photos, I realized that there were several great ones that I had never seen before that would look great on a scrapbook cover! I am the youngest of four children and I was thrilled to discover pictures of my siblings when they were toddlers!
Immediately, a special project popped in my head and I knew that I wanted to preserve these precious pictures in a lovely photo scrapbook page.
It was such a different time and reminiscing about these moments captured in a photo is truly special. I was so ready to organize them and be displayed for others to see, by turning them into lovely scrapbook albums.
But as I started to gather my supplies while getting excited with scrapbook ideas for these pictures, I realized that the lessons I've learned regarding photos could certainly benefit those of you who are just entering the world of scrapbook making.
So join me and let's go through all the photos in that box and make an awesome scrapbook page.
Want more scrapbook layout ideas that will make use of your old photos? Click here and check out our Layout Idea Books!
Lesson 1. Choose a specific theme for your scrapbook album
Whether it's summer, birthday party, or obtaining a driver's license, think "specific" not "broad".
As I was sorting through our family pictures, a smile came across my face each time I saw photos of one of my brothers, my sister, or myself on wheels. There were pictures of us in strollers, riding pedal cars, on tricycles and bicycles, scooters, and skateboards. I decided it would be fun to create a scrapbook layout entitled "Have Wheels, Will Travel". Furthermore, I decided to make four identical memory scrapbook that I could give as gifts to my siblings and of course keep one book for myself.
As you learn how to make a scrapbook page, it's important to choose a specific theme for your scrapbook layouts. You'll come to discover that you can provide more details when you have a narrow theme. Scrapbooks can be just a few pages of great moments rather than filling up an entire big album. This way, each scrapbook page would really be special and unique.
Lesson 2. Be selective about the pictures to include in your scrapbook page

Out of the dozens of photos you have, choose the very best to layout into each of your scrapbook page.
By the time I was through quickly sorting out pictures, I had found 24 perfect photos that I knew I wanted to use for the scrapbook page. There probably were close to 60 "wheel" photos, but some were duplicates and others were too blurry. Thus, I put aside ones that I thought would work great for this project, also considering the size of each photo.
For every individual scrapbook page, you need to be selective with your photos. As you sort and organize them, toss out photos that are unrecognizable or super blurry. If you have lots of photos of the same thing, decide how many you actually want to keep. After all, will you really create something with 20 photos of Niagara Falls? If you can't handle tossing out great photos, pass them on to family members. Additional photos like that would really be helpful for them to build up their own scrapbook page!
Lesson 3. Layout each scrapbook spread.
Designing your pages in advance will help you in creating your scrapbook.
My most favorite part about scrapbook making is creating the layout of each spread (the two side-by-side pages). This particular scrapbook contained only six spreads. Initially, I thought that I would do a spread on each child; however, as I began to move photos around, I decided each spread would contain one or two types of "wheels". I was able to find patterned paper that tied in with the photos perfectly.
As you make a scrapbook, do the same thing - plan your pages in advance. A simple way to do this is to use manila folders. Open each folder and number the spreads. Choose what photos you want to use for each spread first, and then decide on color themes and your backgrounds.
Lesson 4. Creating a Scrapbook: Decide whether to scan, crop, or keep photos "as is"
Don't be afraid to crop photos
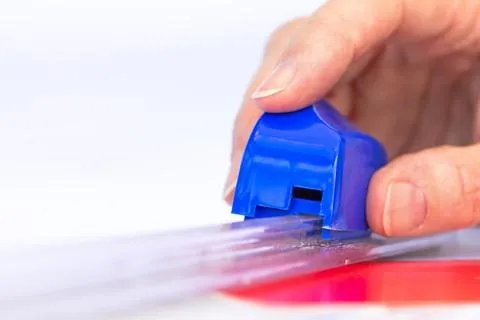
Before you start adhering photos to your scrapbook page, here are a few things to think about.
If you decide to make multiple scrapbooks with the same theme, you'll want to scan your photos or take them to a store to get reprints. When scanning, be sure to use paper that is designed for photos. Regular copier paper will absorb the ink and the photo will just look like a copy rather than a reprint. I scanned the photos that I used and it was hard to tell the quality difference between the originals and the scanned copies.
If you have photos that have a lot of extras in them that distract from the main attraction, then you may crop your photos. As an idea, you may use a template or grab something that is in the shape that you want and trace it. When cropping, keep your shapes simple–stick with ovals, rectangles, and squares. If you like everything that you see in a photo, then simply use it "as is".
Lesson 5. Make journaling fun.
Journaling is more than just jotting down names, dates, and locations.
My second favorite part about scrapbook making is journaling. I love to make journaling fun and interesting. Because my handwriting isn't the best, I usually type rather than write. I use a cursive style font that gives the appearance of awesome handwriting!
Since I don't want the journaling to overpower each scrapbook page, I use black ink on a light beige paper which I cut into strips.
To give you an example of keeping it fun, in one of the photos my brother Carl was riding his tricycle and it looks like he's going to run into a stop sign. I wrote, "STOP Carl! Oops! He's too young to read! Carl, age 3, our street while growing up."
Final Thoughts On Your Photo Scrapbook
Hopefully, you can apply these ideas whenever you make a scrapbook page. Pictures area meant to be treasured and enjoyed–not kept in a dusty old box. Enjoy your scrapbooking journey!
OUR BEST SELLING BOOKS


HERE'S SOME OTHER SCRAPBOOKING ARTICLES THAT YOU MAY FIND HELPFUL
The Top 5 Scrapbooking Tools That Are Proven To Help You Create Better Layouts
12×12 Scrapbook Layouts Tips You Should Never Miss!
5 Tips To Creating Catchy Scrapbook Titles For Your Layouts
TOP 5 Scrapbooking Ideas I LOVE!
How to Scrapbook: The Ultimate 'Learning How to Scrapbook for Beginners'
Scrapbooking Tips: 10 Tips To Help You Create Even More Enchanting Pages!
5 Simple Scrapbook Organization Ideas and Tips!
Scrapbook Stores Online: Shop from the Top 7 Best Craft Stores
Contact Us | Login | Store | About | Reviews | Privacy Policy | Terms & Conditions | Returns
Copyright © 2025 by ScrapbookingCoach.com
We accept payment with:
