How To Make Your Own Scrapbook From Scratch In Under 10 Minutes!
How To Make A Scrapbook
Love putting scrapbooks together, but feel like you have such little time to devote to this hobby? The following will show you how to make a scrapbook layout from scratch in under 10 minutes!
Of course when your family and friends take a look at the scrapbook layouts, they will think that you have spent endless hours on the project, but it will be our little secret
Want to make amazing scrapbook pages in record time? Click here and check our Layout Ideas Books and start scrapbooking like a pro!
Utilize simple layouts
One of the secrets of making attractive layouts for your pages in a small amount of time is to keep the scrapbook layouts simple.
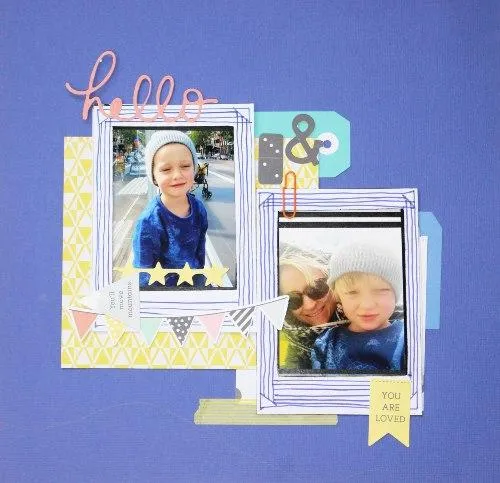
For example, choose one or two pictures to use for the layout.
Mat the photo by using a basic template, such as an oval shape or rectangular shape. Mat a square piece of stock paper for journaling. Using letter rubber stamps, create a title for the page. Cover the sides with stickers and confetti for embellishments.
Tip: Acid free is the way to go! Use acid free adhesive for your pages to prevent corrosion and preserve your scrapbook photos and pages.


Think in terms of a grid
Remember the game of tic tac toe? Make a grid by using two complementary solid colors of scrapbooking paper for the background.
You should have four squares of one color and five squares of the other color. Place a matted photo in the center of the grid and two smaller matted photos in the upper and lower square to the right. Use the upper left square for your title and the lower left square for journaling. Embellish the other empty squares with die-cuts, stickers, flowers, or other small items that you typically enjoy using for your page.
Did you know there's a secret to scrapbooking large photos? Click the video below to see what it is...
Simple, but elegant
A common layout quite often used for scrapbook covers can be created by using a solid dark background with a lighter background for the top quarter of the page.
Use stick-on letters to create the title at the top of the page (on the lighter background paper). Using a square template, crop and mat three photos, all the same size. Equally space two of the photos about an inch or two from the bottom of the page. Center and overlap the third photo above the other two. Use the empty space on the page for journaling and embellishments.
Keeping this concept in mind, you can arrange the photos diagonally or to the left or right of the page.
Highlight one photo
Have photos that deserve pages of their own? Begin by using patterned paper for the background that ties in with the photo. Adhere a 5×7 matted photo center right.
Highlight one photo on page
Horizontally beneath the photo, adhere a wide ribbon. In the center of the ribbon glue a strip of contrasting rick rack. Using a layered label template, make a template for the center of the ribbon. Print a few words on the label to describe the photo. This layout can be used for scrapbooks with most any theme. It's an effective way to bring attention to a photo, yet is very quick to do.
Create a unique background
What is scrapbook paper? Scrapbooking paper is typically used for backgrounds in scrapbooks. However, if you use different materials other than paper for a background, it adds a special touch to your layout.
For Christmas layouts, try using a piece of foil. Making a layout of your flower girl? Use a piece of floral material as the background. Did your child win the spelling bee contest? Make the background out of dictionary pages. Because you want attention drawn to the backgrounds, the rest of the layout can be kept simple. Insert a photo or two, journaling, and a title.

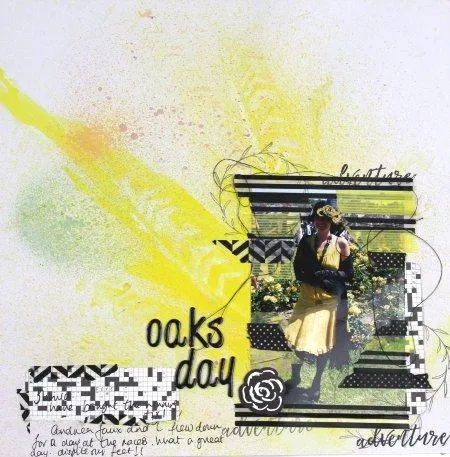
Focus on the title
For a fun scrapbook layout for your pages, draw attention to the title.
Use a solid background. Print a title that will run vertically on the page. Make the letters big enough to fill up at least half of the length of the page. Use a color that will pop against the background. Using cardstock, adhere a rectangle that is shorter than the title, to the middle right of the page. Adhere two matted photos that slightly overlap each other and overlap the cardstock. Journal in the empty areas of the cardstock. If you tend to make scrapbooks that have more than one theme, this layout is a good way to move from one section to another.
Vary the photo sizes
As you work on scrapbooks, you want to use different layouts. If you have several photos that you really want to use in one layout, vary the sizes. Use a solid background. Mat the photos with the same matting and mat a piece of cardstock for journaling. By varying the sizes and using similar matting, the photos won't overwhelm the page.
Utilizing these simple scrapbooking layouts will help you learn how to make a scrapbook in a very short amount of time. Your pages will look as though you spent hours working on them when in reality each page can be done in under ten minutes. One word of caution though, once your friends see your work, they'll be asking for help with their scrapbook album pages!
Topic: How to make a scrapbook
HERE'S SOME OTHER SCRAPBOOKING ARTICLES THAT YOU MAY FIND HELPFUL
The Top 5 Scrapbooking Tools That Are Proven To Help You Create Better Layouts
12×12 Scrapbook Layouts Tips You Should Never Miss!
5 Tips To Creating Catchy Scrapbook Titles For Your Layouts
TOP 5 Scrapbooking Ideas I LOVE!
How to Scrapbook: The Ultimate 'Learning How to Scrapbook for Beginners'
Scrapbooking Tips: 10 Tips To Help You Create Even More Enchanting Pages!
5 Simple Scrapbook Organization Ideas and Tips!
Scrapbook Stores Online: Shop from the Top 7 Best Craft Stores
Contact Us | Login | Store | About | Reviews | Privacy Policy | Terms & Conditions | Returns
Copyright © 2025 by ScrapbookingCoach.com
We accept payment with:

