Scrapbook Tag: How To Create A Bespoke Tag For Your Layouts from Scratch!
How To Create A Bespoke Tag For Your Layouts from Scratch!
In today's post, I will show you how to create a wonderful scrapbook tag for your layout.
Watch the Video Tutorial:
Step By Step Scrapbook Tag Tutorial:
As you can see I have a postal tag here, that is a little big to be an embellishment, so let's turn it into a cute scrapbook tag!

Want to learn more scrapbooking embellishment tips and tricks? Click here and discover more amazing ways to fancy up your scrapbook page!
Step 1
We'll be using an old postal tag like the one in this photo.
So firstly I'm literally going to just cut this right down to the size.
I want and turn it into a lovely embellishment that can either have some journaling on it so we've got to cut it down to size.

Step 2
Cut your tag down to size
See the photo below to see what I've cut it down to!
Next I'm going to choose a nice washi tape that I think would look lovely through it. Maybe a nice bright yellow.

Step 3
Using yellow washi tape
Now I'm going to double up my washi tape. So it doesn't stick , and it also stops it being see through (because the tape is now twice as thick), so this just creates a better color. So I'm just folding in on itself.

Step 4
Then I cut the washi tape so I have a length of about 10cm.

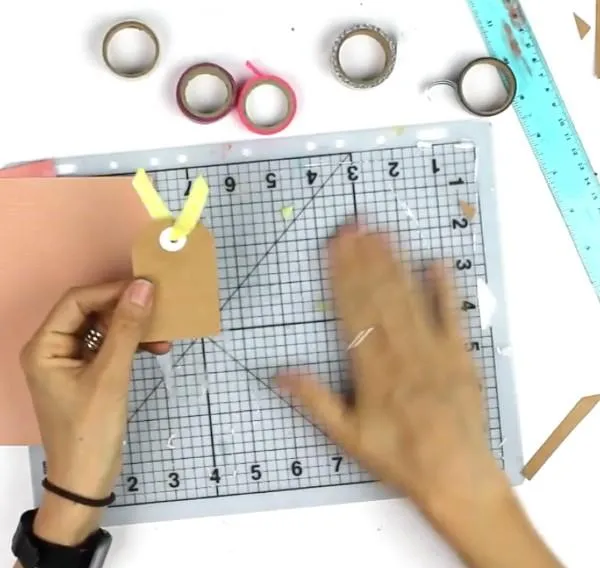
Step 5
So now it's more like a paper ribbon. And then I'm going to put it through the hole at the top of the scrapbook tag!

How simple and cut is that! A handmade tag embellishment in a few short minutes!

