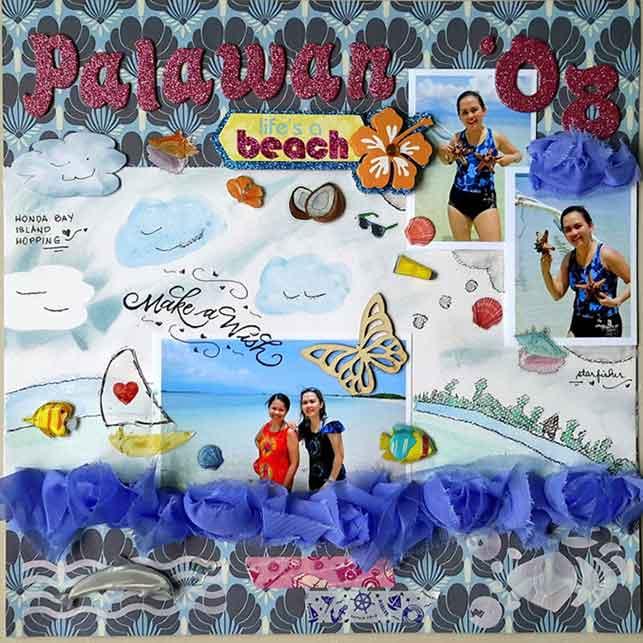
A Beautiful Beach Scrapbook Layout
Beach Scrapbook Layouts: Step by Step Guide for a Stunning Scrapbook
Nothing inspires a beautiful travel scrapbook ideas for a vacation layout like a long beach trip on a tropical island!
Back in 2008, I went island hopping in Palawan, Philippines. It was the very first time that I braved riding a boat hopping from one summer island to another isolated island. I believe they were three to four islands that our group went around for in our vacation getaway. And it was my first visit to Palawan, and the first to get hold of a starfish in such clear and pristine waters.
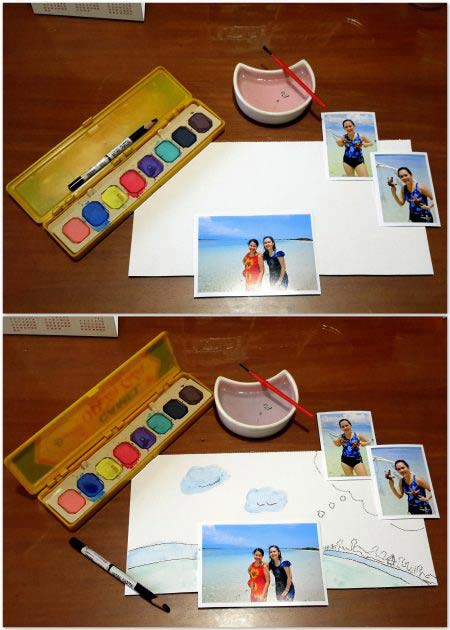
For my beach scrapbook layout, I wanted to create handmade art within my scrapbook page. I started by painting with my watercolor pens a seascape as the background of my photo, making it more of a scrapbook art than a painting on watercolor paper or canvas.
Before we get right on to this scrapbooking layout guide, here are a few things you need to remember:
Working with watercolor for scrapbook pages
Make sure that you are using thick canvas-like paper that absorbs much of the water from the paint. Watercolor paper works well, cardstock might not be ideal since they don't easily absorb the color.
In need of scrapbook layouts for your getaway trips? Click here and check our books so you'll always have the right layout for your getaway trip scrapbook page!
Create a story on a page
A scrapbook tells a lot about you and the memories you made on a certain event or place you've been to. The best way of telling your story starts with a simple but tell-it-all page title. On most of the beach scrapbook layouts I've created, I always made sure I had either a single liner caption or a title to highlight the page's story.
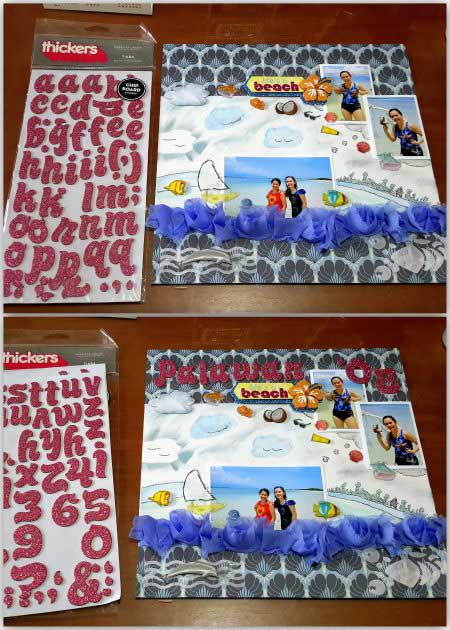
In my beach scrapbook layout, I used fun foam stickers. I used a magenta-glittered scrapbook page because I wanted it to stand out in contrast against the blue beach themed hues around my page.
Cohesive scrapbook ideas
When you're creating a series of pages and want to incorporate various beach scrapbook ideas, try making pages that are connected by a theme. On your scrapbook layout, put mixed hues of blues and cream-colored sand throughout your beach scrapbook layouts.
Bring your ideas to life
Don't be scared to be playful with your ideas when you create your page layouts. Scrapbooking is all about capturing your memories but also allows you to create a new world around those memories. And your memorable vacation on a tropical island for the first time is a scrapbooking paradise.
There are abundant scrapbook layout pages out there and this guide below is a great way for you to explore your scrapbooking ideas.
Your Beautiful Beach Scrapbook Layout Materials
Pattern Paper
Blooms (Webster Pages)
Wooden Butterfly Chipboard Embellishments (Rosie's Studio)
3D Sticker Embellishments (Paper House Productions)
Dimensional Sticker Embellishments (Recollections)
Tiara Glitter Letter Stickers – Thickers (American Crafts)
Washi Tapes
Watercolour Pencils (Faber Castell)
Charcoal Pencil (Faber Castell)
Modeling Paste (LeFranc & Bourgeois)
Camel Watercolour
Inks (Ranger)
Wooden Stamps
Journaling Smash Pen (K&Company)
Stencil
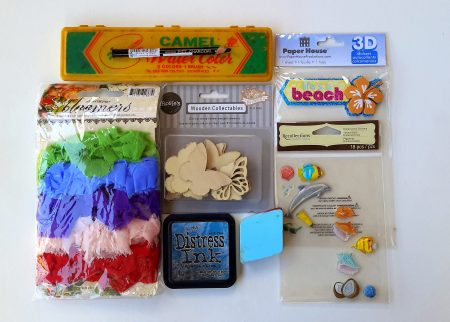
Organize your scrapbook supplies for a stress-free scrapbooking experience!
INSTRUCTIONS
1. Prepare your pattern paper by trimming the unwanted portion with your scissors. Prepare a 12 x 6 inches watercolor paper.
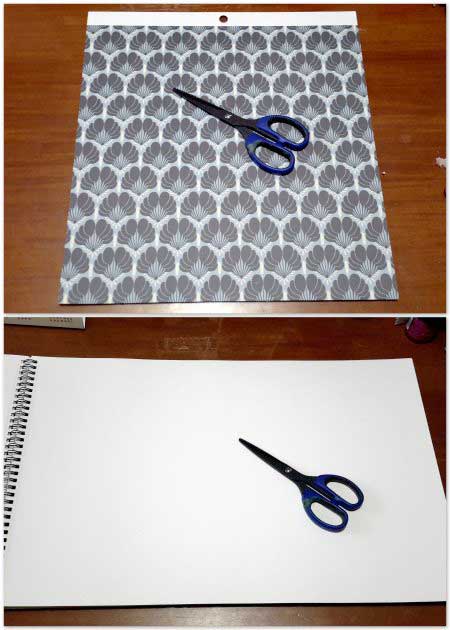
2. See the placement of your photos and watercolor paper on your pattern paper.
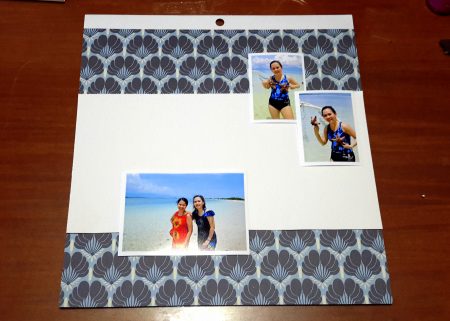
3. Get your watercolor pan and work on your watercolor paper. Paint a seascape that serves as the background of your beach photos.
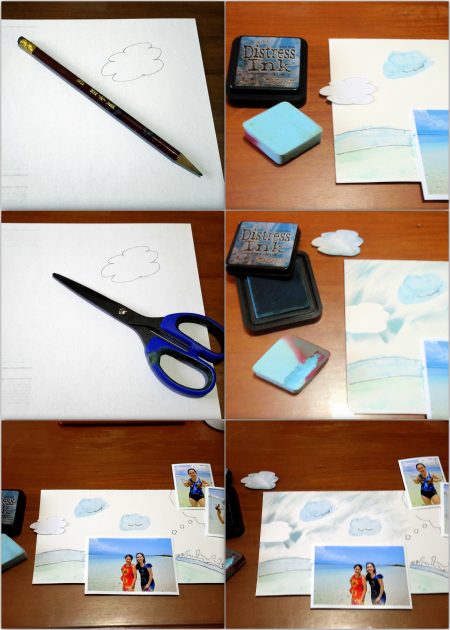
4. Draw a cloud with your pencil on plain paper. Cut out your drawn cloud from your paper. Take out your ink and sponge. Position your cut-out cloud on your seascape. Sponge blue ink around your cut-out cloud without adhering. Sponge or dab more ink around for a skyline.
5. Adhere your painted seascape and your beach photos.
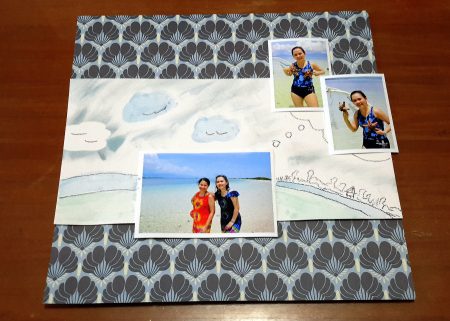
6. Position your cut-out cloud on another part of your painted and created skyline. Adhere your cut-out clouds with dimensional double-sided foam tape.
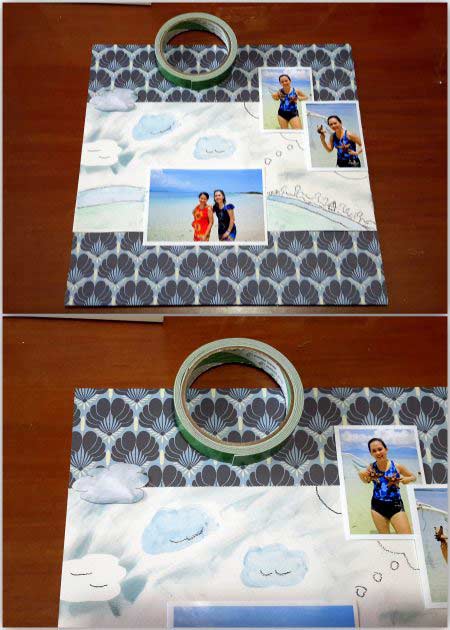
7. Overlap parts of the cloud over the background for an added effect to your beach scrapbook layout.
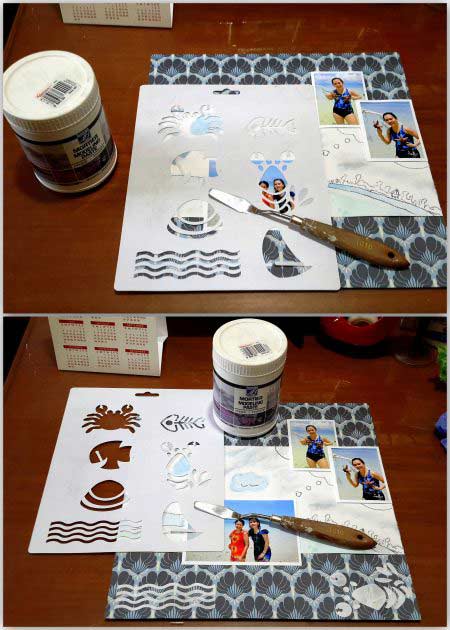
8. With a stencil, use a spatula to apply modeling paste for waves and a lobster on the bottom of your layout as if it were sitting on the beach. With a scrapbook stencil, use the spatula to apply modeling paste on your created seascape for a sailboat over your beach page.
9. Prepare charcoal pencils and coloring pencils. Color your sailboat using charcoal pencil and coloring pencil. Use the charcoal to add depth to your embellishments.
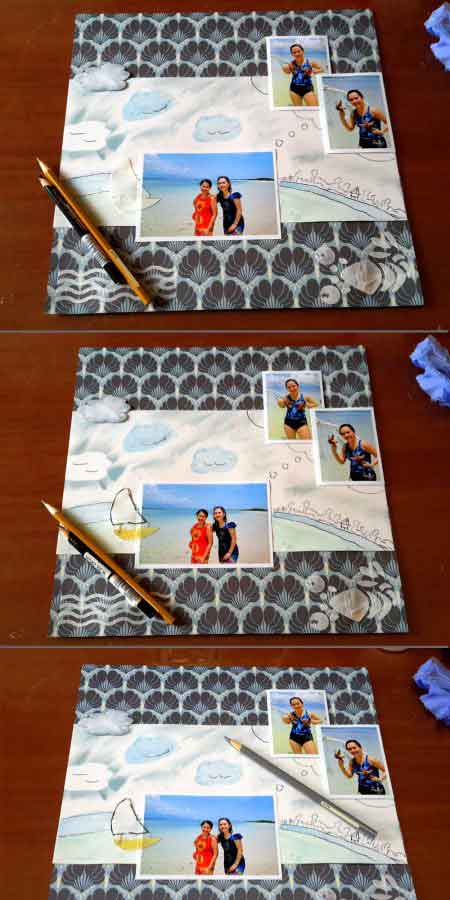
10. Start coloring the thought bubble with your gray coloring pencil. Lightly shade over parts of your cloud to create a 3D effect on your added decorations. Prepare your green coloring pencil.
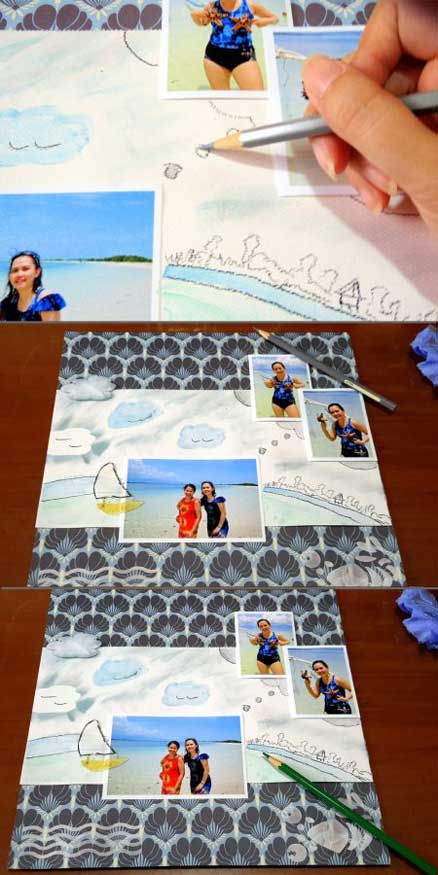
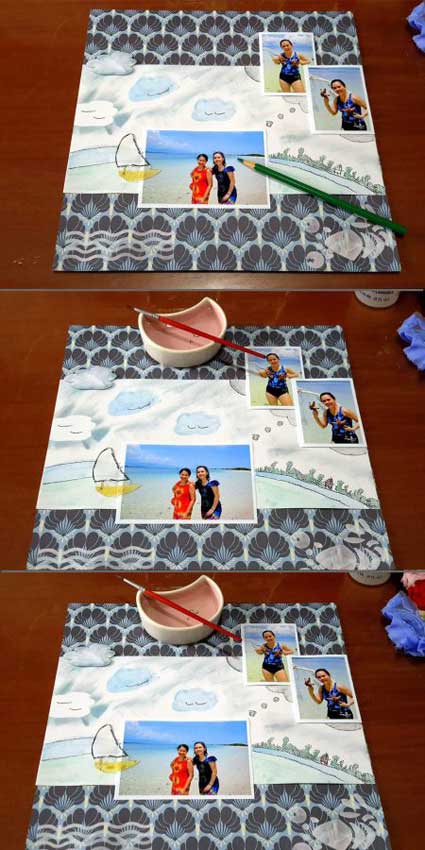
11. Color the palm and coconut trees with your green coloring pencil for a dab of color on your beach drawing. Also, color the nipa hut. Prepare water and your brush. Brush with water the part that was colored by water-soluble coloring pencils.
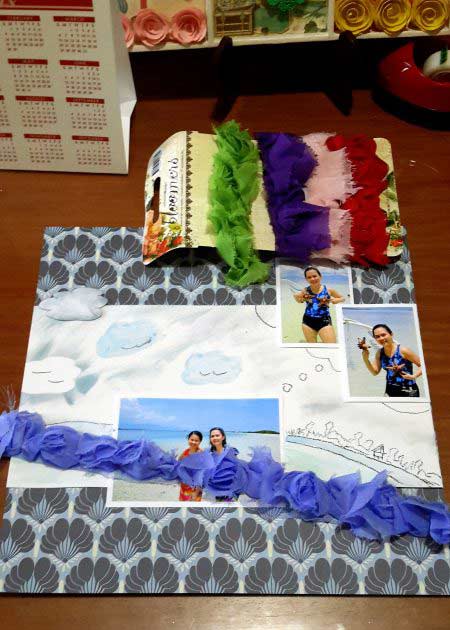
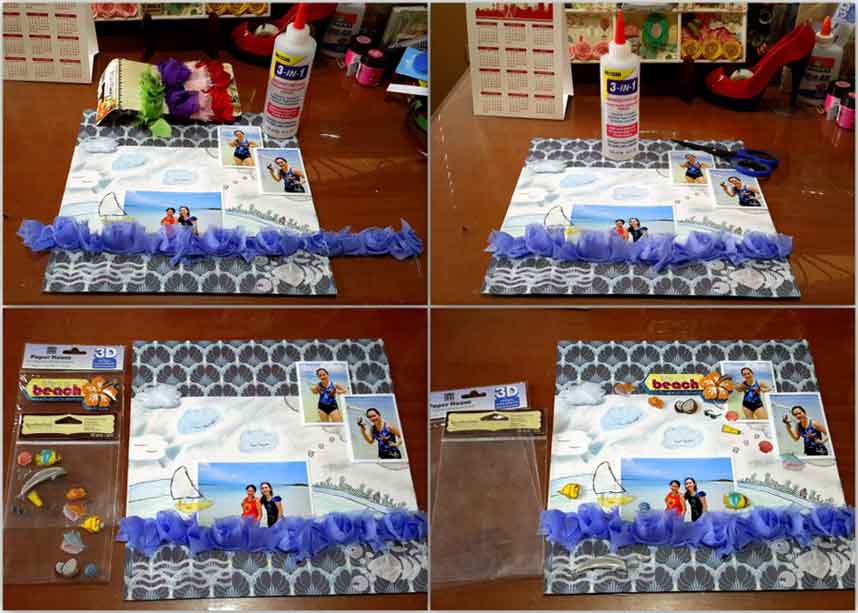
12. Prepare your Blue Blooms and adhere to the page. Prepare 3D or Dimensional Sticker Embellishments. Stick your 3D or Dimensional Sticker Embellishment around your layout.
13. Prepare your glitter letter stickers. Form your layout page title – Palawan '08 with your letter stickers.
14. Get your smash journaling pen. Write subtitles.
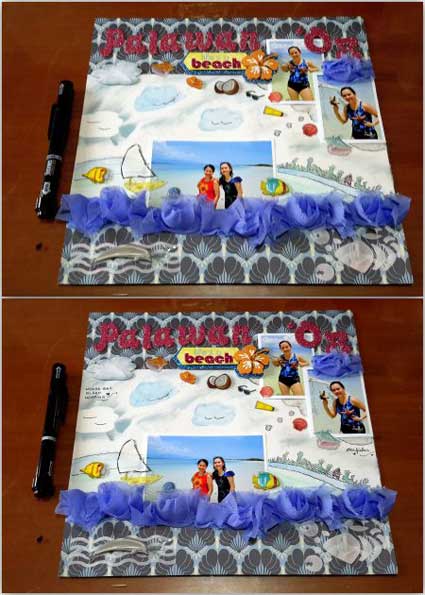
15. Prepare a wooden stamp and ink. Stamp "Make a Wish". Doodle around your stamped "Make a Wish".
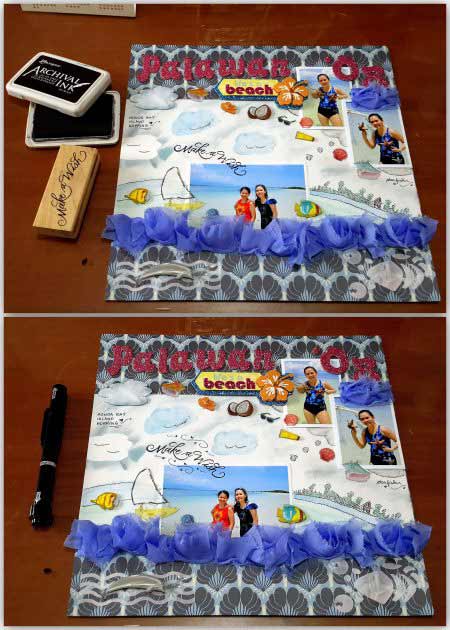
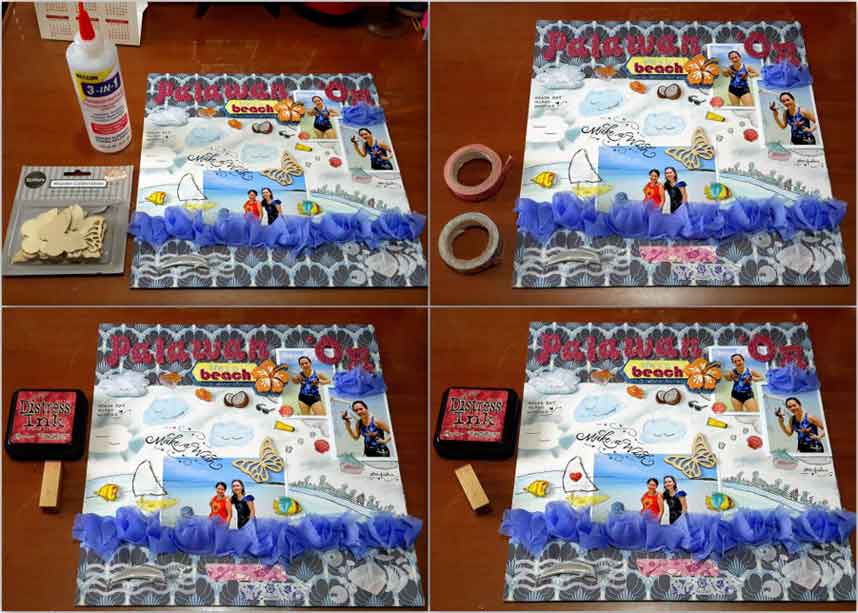
16. Adhere your butterfly wooden chipboard embellishment. Prepare 2 washi tapes. Add washi tapes on the bottom of your layout. Prepare a heart wooden stamp and red ink. As a finishing touch, stamp a heart on the sail of your sailboat.
Want more travel scrapbooking tips? Check out our article about cruise scrapbook ideas and make the most out of your cruise trips!
You now have one Summer-themed Beach Scrapbook Page!
You can share the technique in creating scrapbook layouts with your children or loved ones. You can make your children paint something for you and encapsulate it in a scrapbook page, like what I did — a collaborative scrapbook page as an end result. But I did prefer to work my layout alone. But then, it would be such a good idea for a wonderful and fun-filled family collaboration page layout of art within a scrapbook layout.
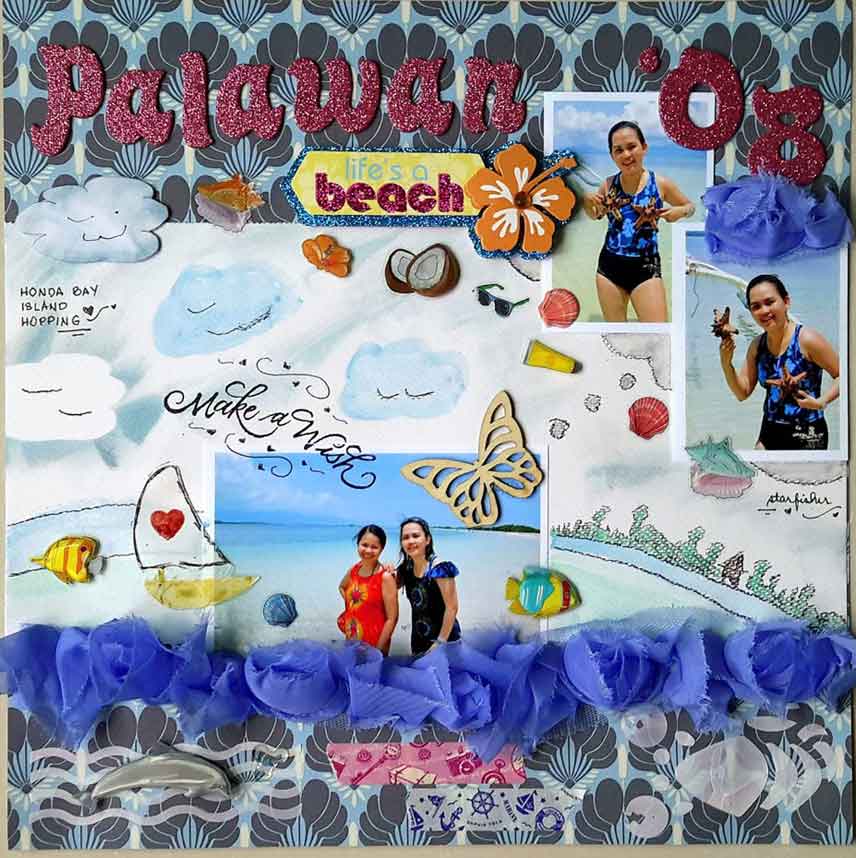
Layout By Kathleen B. Hernandez
